Quantcast
Channel: Digispark – Hackaday
Viewing all 28 articles
Browse latest View live

Teensy tiny Arduino board with an ATtiny85

$
0
0

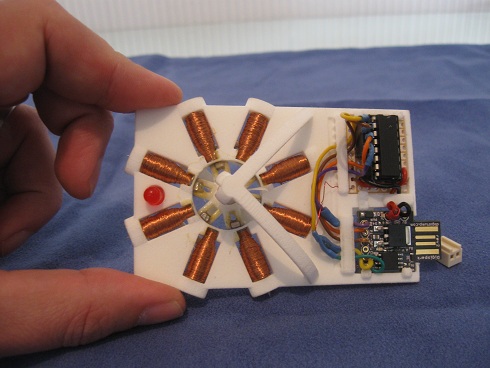
Planning another Arduino build? If you’re just doing something simple like switching a relay or powering a LED, you might want to think about the Digispark. It’s a very small ATtiny-based Arduino compatible board developed and Kickstarted by [Erik].

The Digispark is based on the very popular Atmel ATtiny85, an 8 pin microcontroller that provides a quarter of the Flash storage and RAM as the ‘official Arduino’ ATMega328p. The lower storage space and RAM doesn’t mean the ’85 is a slouch, though; it can run Arduino code without a hitch, providing six pins for whatever small project you have in mind.

Right now, [Erik]‘s Kickstarter is offering three Digisparks for the price of a single Arduino. At that price, it’s cheap enough to leave in a project and not be repurposed after the build is over. [Erik] is also working on a few shields for the Digispark – only RGB LED shield for now, but hopefully he’ll get some more finished by the time the Kickstarter ends.


Filed under: android hacks, kickstarter

Working 3D printed stepper motor

$
0
0

Stepper Small 1

Most 3D printers use stepper motors to control the movement of the extruder head. If you could actually print those motors it would be one more big step toward self-replicating hardware. Now obviously [Chris Hawkins'] working 3d printed stepper motor wasn’t built 100% through 3D printing, but the majority of the parts were. All that he had to add was the electronic driver pieces, magnets, wire, and a few nails.

The coils are made up of nails wrapped in magnet wire. The rotor is a 3D printed framework which accepts neodymium rare earth magnets. The axle is pointed which reduces the friction where it meets the cone-shaped support on either side of the frame. The IC on the upper right is a transistor array that facilitates switching the 20V driving the coils. The board on the lower right is a Digispark, which is an ATtiny85 breakout board that includes a USB edge connector for programming and a linear regulator which is how he gets away with feeding 20V as the source.

Don’t miss the demo video after the break where you can see the motor stepping 7.5 degrees at a time.


Filed under: 3d Printer hacks

Karma Controller makes Reddit a game

$
0
0

karma-controller-reddit

[Will] likes Reddit so much he built this dedicated controller that lets him play the social website like a video game.

He calls it he Karma Controller. In this case, ‘Karma’ refers to ability to accumulate a large number of net up-votes on a Reddit post. The device features seven buttons which are all it takes to up and down vote, navigate up and down on the Reddit listings, toggle images, as well as open and close new tabs for the comments section. We’re wondering if it allows you to follow a link to the post source too?

One of the reasons that we’re featuring this is that it’s only [Will's] second electronics project. If you’re still reluctant to get your hands dirty we hope this acts as inspiration. He started by building the first version on a hunk of protoboard. The Digispark microcontroller seen at the top reads from his button network and communicates with the computer via USB. Once the design was proven he had some help etching this circuit board which is version 2. He shows it off in the clip after the jump.

If you just want some buttons for voting you should take a look at this project which includes a 3D printed enclosure and button covers.


Filed under: peripherals hacks

LED tie plays Tetris

$
0
0

tetris

[Bill] has been working with a gaggle of 8th graders this summer at a STEM camp, impressing them with his geeky attire such as an 8-bit and PCB ties, and an LED illuminated lab coat. The adolescent tinkerers asked him what he would be wearing on the last day. Not wanting to let the kids down, he whipped up an LED Tetris tie in an evening.

The Tetris board is a 20 x 4 grid of WS2811 based RGB LED strips, controlled by a Digispark dev board. Structurally, the tie is just two bits of card stock with the electronic bits sandwiched in between. and taped to a cheap clip-on. In the video below, the tie doesn’t have any sort of input to control the movement and rotation of blocks. [Bill] plans to update his tie with some rudimentary AI so it can play itself.

All the code is over on [Bill]‘s git. It’s still a work in progress, but from the STEM student’s reaction, there’s a lot of potential in this tie.


Filed under: led hacks, wearable hacks

Halloween Doorknocker Decoration Hack

$
0
0

halloweenDoorHack

If you’re new to hacking, Halloween is a great excuse to get started, and [Chuck] has put together an inexpensive animated Halloween decoration that you can show off on your front door. After scoring a $5 plastic Halloween doorknocker from Wal-Mart, [Chuck] gathered together a small pile of components and then set about breathing some life (death?) into its scary but motionless face.

Though he opted to use a Digispark, you should be able to use any Arduino that is small enough to stuff inside the plastic head. [Chuck] cut some holes in the eyeballs and glued in two RGB LEDs, then cobbled together a quick-and-dirty mount in the mouth area to hold a small servo. The lights and the servo are wired to the Digispark, which turns the lights on and instructs the servo to slam the ring against the door. It’s is battery powered and currently has only two settings: on or off. This should be good enough to scare the kids for this year, but [Chuck] has plans to add a much-needed motion sensor and sound via a Bluetooth connection. 

As simple as this build is, it could be just the thing to get you in the holiday spirit, or to introduce the young hacker in your home to the world of electronics and coding. Check out the short video of the doorknocker after the break, then swing by [Chuck's] website for detailed build instructions and his Github for the source code. If you’re having trouble finding this doorknocker at Wal-Mart, [Chuck] recommends a similar one on Amazon. Don’t stop now! Make some Flickering Pumpkins too, or if you want a challenge, hack together your very own Pepper’s Ghost illusion.


Filed under: Arduino Hacks, Holiday Hacks, led hacks

Body of a Trinket, Soul of a Digispark

$
0
0

TrinketDigispark

Adafruit’s Trinket and digiStump’s Digispark board are rather close cousins. Both use an ATtiny85 microcontroller, both have USB functionality, and both play nice with the Arduino IDE. [Ray] is a fan of both boards, but he likes the Trinket hardware a bit better. He also prefers the Digispark libraries and ecosystem. As such, he did the only logical thing: he turned his Trinket into a Digispark. Step 1 was to get rid of that pesky reset button. Trinket uses Pin 1/PB5 for reset, while Digispark retains it as an I/O pin. [Ray] removed and gutted the reset button, but elected to leave its metal shell on the board.

The next step was where things can get a bit dicey: flashing the Trinket with the Digispark firmware and fuses. [Ray] is quick to note that once flashed to Digispark firmware, the Trinket can’t restore itself back to stock. A high voltage programmer (aka device programmer) will be needed. The flashing process itself is quite a bit easier than a standard Trinket firmware flash. [Ray] uses the firmware upload tool from the Micronucleus project. Micronucleus has a 60 second polling period, which any Trinket veteran will tell you is a wonderful thing. No more pressing the button and hoping you start the download before everything times out! Once the Trinket is running Digispark firmware, it’s now open to a whole new set of libraries and software.


Filed under: Arduino Hacks, news

Digispark Pro, The Bigger Smaller Dev Board

$
0
0

digi

There has recently been a huge influx of extremely small dev board based on the ATtiny85. This small 8-pin microcontroller is able to run most Arduino sketches,  and the small size and low price of these dev boards means they have been extremely popular. The Digispark was among the first of these small boards, and now the creator is releasing a newer, bigger version dubbed the Digispark Pro.

The new board isn’t based on the ‘tiny85, but rather the ATtiny167. This larger, 20-pin chip adds 10 more I/O pins, and a real hardware SPI interface, but the best features come with the Digispark Pro package. There’s real USB programming, device emulation, and serial over USB this time, and the ability to use the Arduino serial monitor, something not found in the original Digispark.

There are also a few more shields this time around, with WiFi and Bluetooth shields available as additional rewards. Without the shields, the Digi Pro is cheap, and only $2 more per board than the original Digispark.


Filed under: ATtiny Hacks, Crowd Funding

A Hacker-Friendly Blinky USB Stick

$
0
0

The availability of Smart RGB LED’s, either as individual units, as strips or even as panels, have made blinky light projects with all kinds of color control and transition effects easy to implement using even the simplest of controllers. Libraries that allow control of these smart LEDs (or Smart Pixels as they are sometimes called)  make software development relatively easy.

[overflo] at the Metalab hackerspace in Vienna, Austria recently completed development of usblinky – a hacker friendly blinky USB stick. It can control up to 150 WS2812B smart LED’s when powered via an external power supply, or up to 20 LED’s when powered via a computer USB port. The micro-controller is an ATTiny85 running the Micronucleus bootloader which implements software USB using vUSB. The hardware is based on the DigiSpark platform. The usblinky software sources are available on their Github repo. The section on pitfalls and lessons learned makes for interesting reading.

Metalab plans to run workshops around this little device to get kids into programming, as it is easy enough and gives quick visual feedback to get you started. To round off the whole project, [overflo] used OpenSCAD to design a customizable, 3D printable “parametric orb” which can house the LED strip and make a nice enclosure or psychedelic night light. Check out the mesmerizing video of the usblinky Orb after the break.

Thanks to [papst] for sending in this tip.


Filed under: Microcontrollers

The Digistump Oak; An ESP8266 On Kickstarter

$
0
0

When it was first released, the ESP8266 was a marvel; a complete WiFi solution for any project that cost about $5. A few weeks later, and people were hard at work putting code on the tiny little microcontroller in the ESP8266 and it was clear that this module would be the future of WiFi-enabled Things for the Internet.

Now it’s a Kickstarter Project. It’s called the Digistump Oak, and it’s exactly what anyone following the ESP8266 development scene would expect: WiFi, a few GPIOs, and cheap – just $13 for a shipped, fully functional dev board.

The guy behind the Oak, [Erik Kettenburg], has seen a lot of success with his crowdfunded dev boards. He created the Digispark, a tiny, USB-enabled development board that’s hardly larger than a USB plug itself. The Digispark Pro followed, getting even more extremely small AVR dev boards out in the wild.

The Digistump Oak moves away from the AVR platform and puts everything on an ESP8266. Actually, this isn’t exactly the ESP8266 you can buy from hundreds of unnamed Chinese retailers; while it still uses the ESP8266 chip, there’s a larger SPI Flash, and the Oak is FCC certified.

Yes, if you’re thinking about building a product with the ESP8266, you’ll want to watch [Erik]’s campaign closely. He’s doing the legwork to repackage the ESP into something the FCC can certify. Until someone else does it, it’s a license to print money.

The FCC-certified ESP8266 derived module, cleverly called the Acorn, will be available in large quantities, packaged in JEDEC trays sometime after the campaign is finished. It’s an interesting board, and we’re sure more than one teardown of the Acorn will hit YouTube when these things start shipping.


Filed under: Crowd Funding, Microcontrollers, wireless hacks

Controlling Mains Power Rube Goldberg Style

$
0
0

[g3gg0] has some nice radio equipment including an AOR AR-5000 receiver and a HiQ SDR. They are so nice that it appears they lack an on/off switch. [g3gg0] grew tired of unplugging the things, and decided to nerdify his desk with a switch that would turn his setup on and off for him. He decided to accomplish this task by emulating the Scroll, Number and Caps Lock LEDs on his keyboard via a Digispark board. He uses the LEDs to issue commands to the Digispark allowing him to control a 5V relay, which sits between it and the AC.

Starting off with some USB keyboard emulation code on the Digispark, he tweaked it so he could use the Scroll Lock LED as sort of a Chip Select. Once this is pressed, he can use the Caps Lock and the Number Lock LED to issue commands to the Digispark.

It’s programmed to only stay on for a total of 5 hours in case he forgets to turn it off. Let us know what you think about this interesting approach.


Filed under: ATtiny Hacks, home hacks

USB Volume Control

$
0
0

If you buy expensive computer speakers, they often have a volume knob you can mount somewhere on your desk so you aren’t dependent on the onboard volume control. [Kris S] decided to build his own version of the remote volume control. Not surprisingly, it uses an Arduino-compatible Digispark board and a rotary controller. The Digispark (that [Kris S] bought for $2) is compatible with the Adafruit Trinket. This is key because the Trinket libraries are what make it easy to send media keys over the USB (using the HID interface) to control the volume.

Really, though, the best part of the build is the good looking knob made out of a pill bottle (see the video below). The micro Digispark is small enough to fit in the lid of the pill bottle, and some wax and pellets add some heft to the volume control.

The standard Arduino library has trouble sending multimedia keys, but in a previous post I built a gesture-based volume control that managed to pull it off.  We’ve also covered a similar volume control in the past. That one is also very good looking, but was a more complicated build than what [Kris S] pulled off here.


Filed under: Arduino Hacks, peripherals hacks

Pump Up the Volume with Lead Shot and LEDs

$
0
0

One of the redeeming qualities of many modern cheap keyboards is the built-in volume control buttons. But this is Hackaday, and many of us (and you) have Model Ms or newfangled mechanical keyboards that only have the essential keys. Those multimedia buttons only adjust the system volume anyway. We would bet that a lot of our readers have sweet sound systems as part of their rig but have to get up to change the volume. So, what’s the solution? Build a color-changing remote USB volume knob like [Markus] did.

Much like the Instructable that inspired him, [Markus] used a Digispark board and a rotary encoder. The color comes from a WS2812 LED ring that fits perfectly inside a milky plastic tub that once held some kind of cream. When the volume is adjusted, the ring flashes white at each increment and then slowly returns to whatever color it’s set to. Pushing the button mutes the volume.

The components are pretty lightweight, and [Markus] didn’t want the thing sliding all over the desk. He took an interesting approach here and filled the base with the lead from a shotgun round and some superglue. The rotating part of the button needed some weight too, so he added a couple of washers for a satisfying feel. Be sure to check out the demonstration after the break.

Digispark board not metal enough for you? Here’s a volume knob built around a bare ATtiny85 (which is the same thing anyway).


Filed under: computer hacks

Hackaday Prize Entry: A Better Way Of Cheating

$
0
0

Believe it or not, some video games are still developed for the PC. With video games come cheat codes, and when they’re on the PC, that means using a keyboard. You can easily program any microcontroller to send a string of characters over a USB port with the touch of a button. Believe it or not, a lot of people haven’t put these two facts together. [danjovic] has, leading him to build a simple and cheap USB keystroke generator for quickly typing in cheat codes.

[danjovic] is basing his build around a Digispark, a cheap, USB-enabled ATtiny85 dev board. This, of course, means there’s not a lot of pins to play with – there are only four I/O pins, and one of them is connected to ground by a LED. That leaves only three I/O pins, but [danjovic] managed to put seven different cheats in his project using diodes and something that is almost charlieplexing.

If you’re wondering, this is a very inexpensive project. [danjovic] is using a Chinese digispark clone, a handful of 1N4148 diodes, and a few tact switches. Anyone with a well-stocked part drawer or a tenner on eBay could build this. If you want the proof of work for this project, you can check out the demo video below.


Filed under: peripherals hacks, The Hackaday Prize

Just In Time For Christmas! A DIY Desktop LED Tree

$
0
0

Okay, we haven’t even hit Halloween yet, but if you’re planning some kind of holiday project, now’s a good time to start ordering your parts, especially if you’re designing your own PCB. While there’s no PCB involved, [designer2k2] built a desktop “hollow” Christmas tree using some WS2812 RGB LEDs controlled by a microcontroller and powered by USB.

The board running [designer2k2]’s project is a Digispark, a USB powered board by Digistump which contains an ATtiny85. The LEDs, four different sized NeoPixel rings, plus a single pixel for the top, are connected together using some solid wire which makes for a very cool look. The code that runs on the ATtiny is the part that really makes this tree. The code cycles through colors and some light chaser effects, as well as a mode that shows a green tree with some white lights. The whole project is topped off by a routine that spells “XMAS” as you look at the tree from the top down.

We’ve seen some other Christmas tree hacks over the years controlled by various things, but this one is a fairly simple, cool design. [Designer2k2] also released the code for the tree and I’m sure a lot of us could come up with some more light designs.

Check out the video after the break:


Filed under: ATtiny Hacks, Holiday Hacks

Another Desktop LED Xmas Tree!

$
0
0

We love it when someone takes inspiration from one of our posts and comes up with their own twist on it. [Matthew] liked one builds he saw on Hackaday so much, he built his own LED desktop Xmas tree!

[Matthew] was inspired by [designer2k2]’s DIY desktop Xmas tree that was posted in October. To get started, he found a set of concentric WS2812 rings over on Ali Express. The five rings total 93 LEDs, plus a single WS2812 for the top of the tree. He also got a laser cut tree model from Thingiverse and had it cut, combining the LED rings with the tree in the final product

The whole thing running on a Digispark USB Development Board from DigiStump, the same as the original project. There aren’t many details in the video, but [Matthew] has put links to where he got the rings and the tree, the laser cutting service, a link to the DigiStump website as well as a link to [designer2k2]’s original tree project. There’s no source code yet, but [Matthew] says a link to it is coming along with some more pictures.


Filed under: ATtiny Hacks, Holiday Hacks, led hacks

Unlocking 12V Quick Charge on a USB Power Bank

$
0
0

[Robert Nixdorf] frequently needs to use this high-end audio recorder, but it sucks dry a set of eight AA batteries in just a few hours. Obviously a longer lasting solution was required, and he started scouring the web looking for an answer. He bought a Quick Charge power bank and then hacked a Digispark to negotiate with the power bank to provide 12V output to Quick Charge his audio recorder.

Qualcomm’s Quick Charge system is designed to provide increased output voltages to reduce charging time in QC compatible devices such as mobile phones powered by their Snapdragon range of SoC’s. Depending on how the end-point negotiates with the charger, either 5V, 9V or 12V outputs are supported.

You can dig into the details in Qualcomm’s Quick Charge Patent [PDF] which shows how the system works. Quite simply, the voltage provided by the charger depends on the signals set on the D+ and D- data pins during the initial handshaking phase. [Robert] found it easy to get his QC charger to provide the required voltage by using a 3V3 voltage regulator and a resistive divider. But a more permanent solution would be needed if he wanted to use it on the field.

His parts bin revealed a Digispark board and he set about hacking it. He isolated the VUSB from the rest of his board since it would get pulled up to 12V when in use. And then replaced the existing 5V regulator with a 3V3 one. This required several bodges which he has documented on his blog. Some simple code flashed on the ATtiny85 handles all of the handshaking and sets up 12V output to run his audio recorder. A single charge on the power bank now lasts him almost 12 hours, so he’s pretty satisfied with the hack.

Quick Charge is currently at version 4 and supports USB-C and USB-PD hardware such as cables and connectors. But it seems using USB-C hardware outside of the current USB-C specifications is deprecated, with reports suggesting Google is asking OEM’s not to use Quick Charge but stick to USB-PD. Let’s hope this gets settled one way or another soon.

Thanks, [Frank] for the tip.


Filed under: ATtiny Hacks, hardware

Simple RC to USB Interface

$
0
0

With the radio control hobby arguably larger now than it ever has been in the past, there’s a growing demand for high-fidelity PC simulators. Whether you want to be able to “fly” when it’s raining out or you just want to practice your moves before taking that expensive quadcopter up for real, a good simulator on your computer is the next best thing. But the simulator won’t do you much good if it doesn’t feel the same; you really need to hook your normal RC transmitter up to the computer for the best experience.

[Patricio] writes in to share with us his simple hack for interfacing his RC hardware to his computer over USB. Rather than plugging the transmitter into the computer, his approach allows the receiver to mimic a USB joystick. Not only is this more convenient since you can use the simulator without wires, but it will make sure that the minutiae of your radio hardware (such as response lag) is represented in the simulation.

The setup is actually very simple. [Patricio] used the ATtiny85 based Digispark development board because it’s what he had on hand, but the principle would be the same on other microcontrollers. Simply connect the various channels from the RC receiver to the digital input pins. RC receivers are 5 VDC and draw very little current, so it’s even possible to power the whole arrangement from the USB port.

On the software side, the Arduino sketch does about what you expect. It loops through listening for PWM signals on the input pins, and maps that to USB joystick position information. The current code only supports three channels for a simple airplane setup (X and Y for joystick, plus throttle), but it should be easy enough to follow along and add more channels if you needed them for more complex aircraft.

For more information on the intricacies of RC transmitter and receiver interaction, check out this fascinating research on receiver latency.

DIY Rubber Ducky is as Cheap as its Namesake

$
0
0

The “Rubber Ducky” by Hak5 is a very powerful tool that lets the user perform rapid keystroke injection attacks, which is basically a fancy way of saying the device can type fast. Capable of entering text at over 1000 WPM, Mavis Beacon’s got nothing on this $45 gadget. Within just a few seconds of plugging it in, a properly programmed script can do all sorts of damage. Just think of all the havoc that can be caused by an attacker typing in commands on the local machine, and now image they are also the Flash.

But unless you’re a professional pentester, $45 might be a bit more than you’re looking to spend. Luckily for the budget conscious hackers out there, [Tomas C] has posted a guide on using open source software to create a DIY version of Hak5’s tool for $3 a pop. At that cost, you don’t even have to bother recovering the things when you deploy them; just hold on tight to your balaclava and make a run for it.

The hardware side of this hack is the Attiny85-based Digispark, clones of which can be had for as low as $1.50 USD depending on how long your willing to wait on the shipping from China. Even the official ones are only $8, though as of the time of this writing are not currently available. Encapsulating the thing in black shrink tubing prevents it from shorting out, and as an added bonus, gives it that legit hacker look. Of course, it wouldn’t be much of a hack if you could just buy one of these little guys and install the Rubber Ducky firmware on it.

In an effort to make it easier to use, the official Rubber Ducky runs scripts written in a BASIC-like scripting language. [Tomas C] used a tool called duck2spark by [Marcus Mengs], which lets you take a Rubber Ducky script (which have been released by Hak5 as open source) and compile it into a binary for flashing to the Digispark.

Not quite as convenient as just copying the script to the original Ducky’s microSD card, but what do you want for less than 1/10th the original’s price? Like we’ve seen in previous DIY builds inspired by Hak5 products, the trade-off is often cost for ease of use.

[Thanks to Javier for the tip.]

Aladdin Lamp Shoots Flames with a Snap of Your Fingers

$
0
0

Despite their dangers, even Marie Kondo would not convince us to abandon flamethrower projects because they literally spark joy in us. To make this flame shooting Aladdin lamp [YeleLabs] just used a 3D printer and some basic electronics.

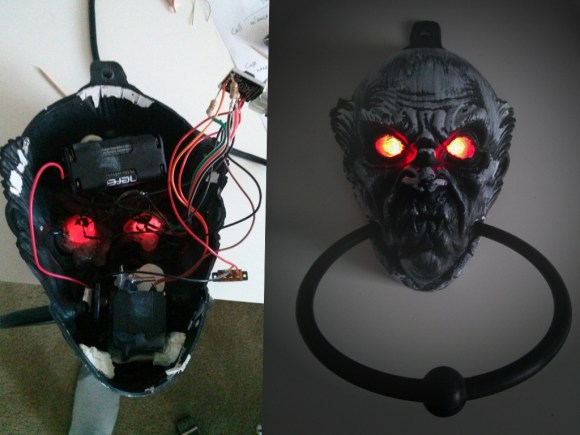
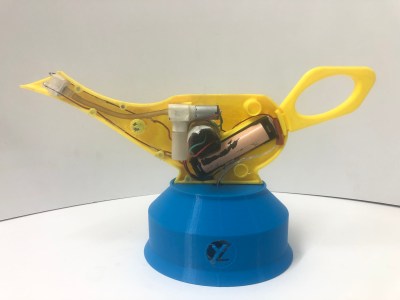
The lamp body consists of two 3D-printed halves held together by neodymium magnets. They house a 400 kV spark generator, a fuel pump plus tank, and a 18650 Li-ion battery. The fuel pump is actually a 3 V air pump but it can also pump liquids at low pressure. As fuel [YeleLabs] used rubbing alcohol that they mixed with boric acid to give the flame a greenish tint. The blue base at the bottom of the lamp houses the triggering mechanism which magically lights up the lamp when you snap your fingers. This is achieved by a KY-038 microphone module and KY-019 relay module connected to a Digispark ATTiny85 microcontroller. When the microphone signal is above a certain threshold the relay module will simultaneously switch on the spark generator and fuel pump for 150 ms.

Although they proclaim that the device is a hand sanitizer it is probably safer to stick to using soap. The project still goes on the list of cool flamethrower props right next to the flame shooting Jack-o-Lantern.

Video after the break.

Bolt-On Clog Detection for Your 3D Printer

$
0
0

Desktop 3D printing technology has improved by leaps and bounds over the last few years, but they can still be finicky beasts. Part of this is because the consumer-level machines generally don’t offer much in the way of instrumentation. If the filament runs out or the hotend clogs up and stops extruding, the vast majority of printers will keep humming along with nothing to show for it.

Looking to prevent the heartache of a half-finished print, [Elite Worm] has been working on a very clever filament detector that can be retrofitted to your 3D printer with a minimum of fuss. The design, at least in its current form, doesn’t actually interface with the printer beyond latching onto the part cooling fan as a convenient source of DC power. Filament simply passes through it on the way to the extruder, and should it stop moving while the fan is still running (indicating that the machine should be printing), it will sound the alarm.

Inside the handy device is a Digispark ATtiny85 microcontroller, a 128 x 32  I2C OLED display, a buzzer, an LED, and a photoresistor. An ingenious 3D printed mechanism grabs the filament on its way through to the extruder, and uses this movement to alternately block and unblock the path between the LED and photoresistor. If the microcontroller doesn’t see the telltale pulse after a few minutes, it knows that something has gone wrong.

In the video after the break, [Elite Worm] fits the device to his Prusa i3 MK2, but it should work on essentially any 3D printer if you can find a convenient place to mount it. Keep a close eye out during the video for our favorite part of the whole build, using the neck of a latex party balloon to add a little traction to the wheels of the filament sensor. Brilliant.

Incidentally, Prusa tried to tackle jam detection optically on the i3 MK3 but ended up deleting the feature on the subsequent MK3S since the system proved unreliable with some filaments. The official line is that jams are so infrequent with high-quality filament that the printer doesn’t need it, but it does seem like an odd omission when even the cheapest paper printer on the market still beeps at you when things have run afoul.

Viewing all 28 articles
Browse latest View live


<script src="https://jsc.adskeeper.com/r/s/rssing.com.1596347.js" async> </script>